How-To’s
Explore our Self-guided Tutorials
Mask chain set up kit
How-to
1. Start by make a knot at the end of the thread. Try and make a double or triple knot on top of each other.
2. Thread the calotte on the nylon so that the knots are sitting in the base of the calotte.
3. Close the base of the calotte over the knots to hide them secure inside.
4. Start beading your mask chain using the wire to help thread on the beads.
Create to whatever length you want. 68cm/27” is a standard length.
5. Once you have finished your design, add the last calotte to the nylon and tie a few knots close to the base and repeat step 3.
6. Add clasps into the top loop of each calotte and gently curl the loops closed.

Wire Wrap Ring Tutorial
1. Measure your ring size.
2. Wrap wire around the mandrel to create a ring base. Use a ring mandrel to make your ring the right size.
3. Add a bead, stone or pearl of your choice.
4. Secure the tail of wire and trim.
5. Have fun wearing your wire wrapped ring!
6. Repeat steps to make rings for family and friends 😉
Adding a Clasp Using Softflex and Crimps
1. Put softflex/beading wire through the crimp.
2. Thread the small end of the clasp onto the beading wire.
3. Pass the beading wire back through the crimp, and move the crimp close to the clasp.
4. Using a pair of flat nose pliers, squish the crimp flat.
5. Thread your beads over both strands of the beading wire.
6. Repeat steps 1 to 4, using a split ring for the other side of the clasp.

How to make earrings with headpins and eyepins
Create a pair of earrings!
You will need…
- Ear wires x 2 – in the metal type and colour of your choice. Country Beads carries a range of different ear wire styles and metal types including sterling silver, gold fill, stainless steel and base metal.
- Beads – beads with center drilled holes – holes that go from top to bottom. If you have beads with top drilled holes – holes that go across the top, see our wire wrapping tutorial.
- Head pins x 2 – in the metal type and colour of your choice, the guage of wire needs to fit the hole on your. The length needs to fit your bead with space to create a loop.
- Eye pins x 2 – in the metal type and colour of your choice, the guage of wire needs to fit the hole on your. The length needs to fit your bead with space to create a loop.
Steps…
Follow along with our YouTube video! Pause, rewind and watch in your own time.
Have fun!
Beaded Wire Letters
Create a cute and personalized beaded letter to add the finishing touch to any gift!
You will need…
- Wire – Stainless Steel 22 gauge. Stainless Steel wire is a stiffer wire and will hold its shape better.
We have used 22 gauge wire to fit size 6 or 8 seed beads. - Seed Beads – size 6 or 8. Any beads can be used as long as it fits the wire. The thicker the wire gauge the more the letter will hold the final shape.
- Paper and pencil – Draw your letter on paper first to make an easy template to follow.
Steps…
- Draw letter on paper
- Cut a length of wire
- Loop one end of the wire so beads wont fall off
- Thread seed beads onto wire
- Loop other end of wire closed
- Use your paper letter template as a guide and bend the beaded wire into shape
- Attach to a gift, card or use completed letter as a decoration
Attaching a Clasp with a Foldover
1. Start with your foldover, length of cord and clasp.
2. Put your cord down the center of the fold over. Generally there are small ‘teeth’ at the bottom of foldover that will help grip the cord in place.
3. Gently on an angle, while holding your cord in place, fold one side of the foldover, using a pair of flat nose pliers on an angle, on top of the cord squeezing tightly.
4. Fold the other side of the piece over the first one, sandwiching the cord in place within the finding.
5. Complete one end with clasp and check length of your cord, cut to desired length and repeat steps 2-4 for the other side.

Wire wrap your delicate chain:
When your chain is too thin and your jump ring too thick, the solution is wire wrap.
This is what you need:
- Chain
- Clasp
- Wire Cutter
- Flat nose pliers
- Round nose pliers
- 2 x 6″ Pieces of 26 gauge wire
- Small bead (optional)
- Charm or a pendant of your choice!

What you need to wire wrap your own chain
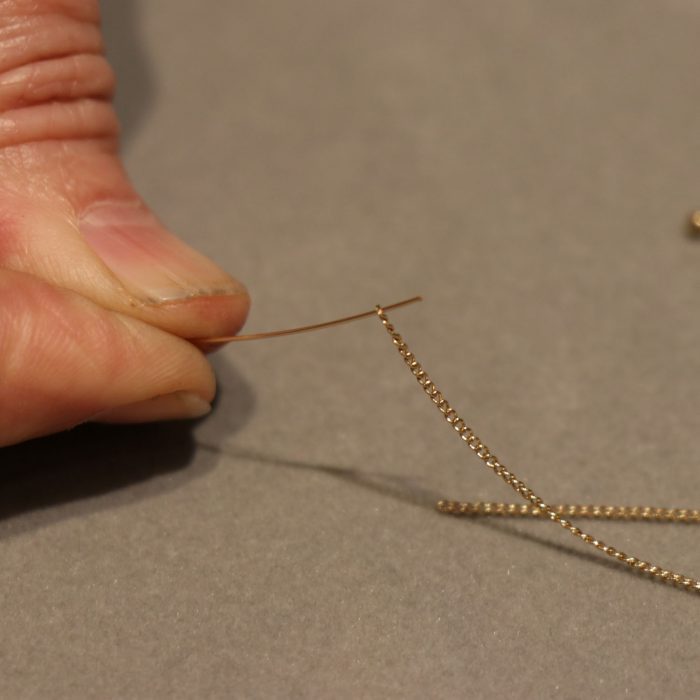
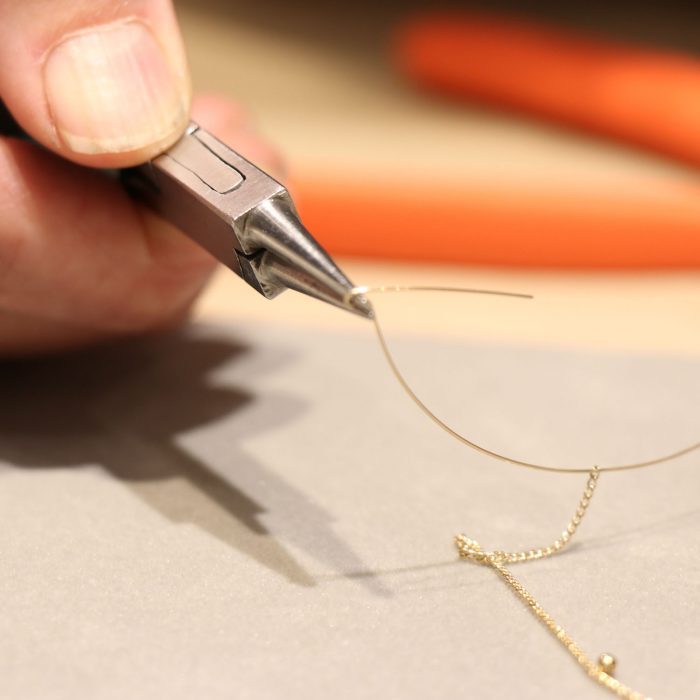
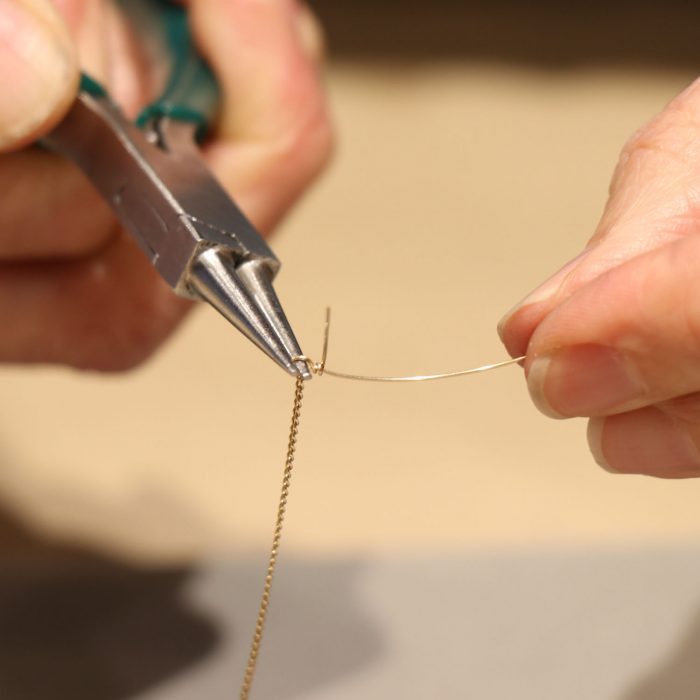
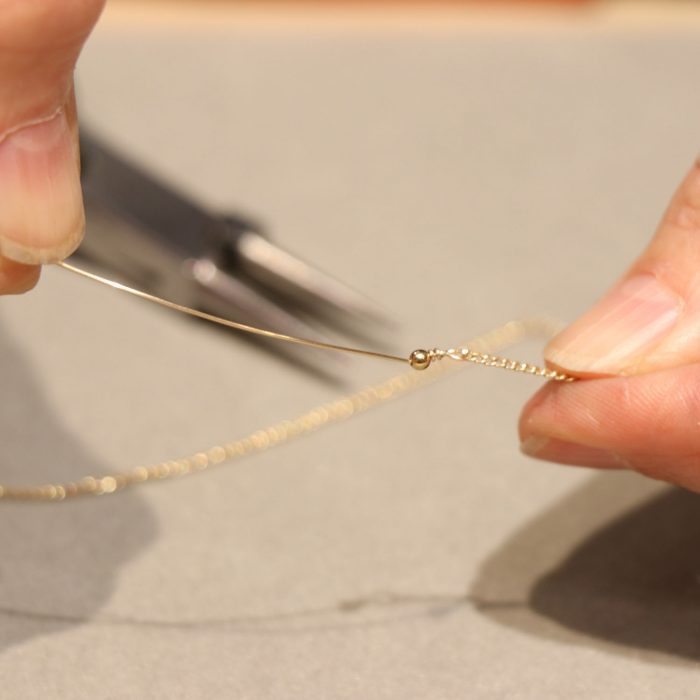
Step 1- Put the wire through the last link of your chain
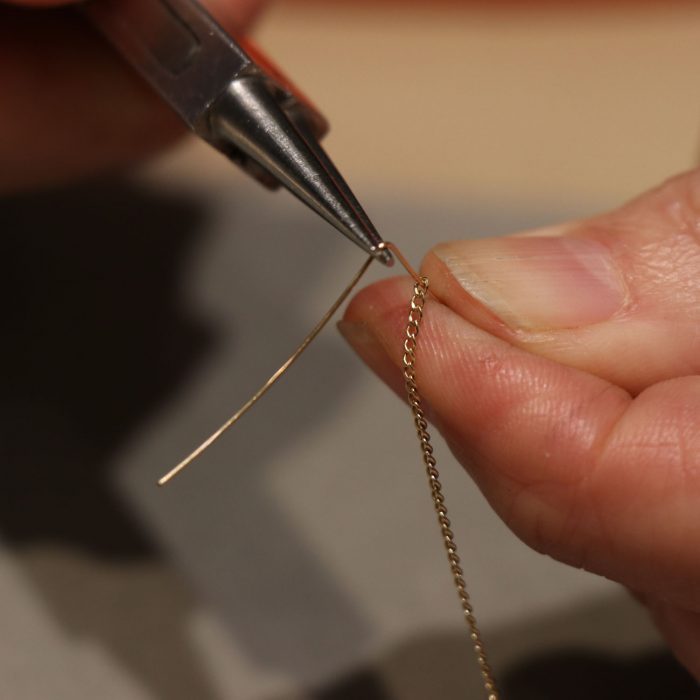
Step 2- About 3 inches from the end of the wire, bend the wire 90 degrees away from you using your round nose pliers
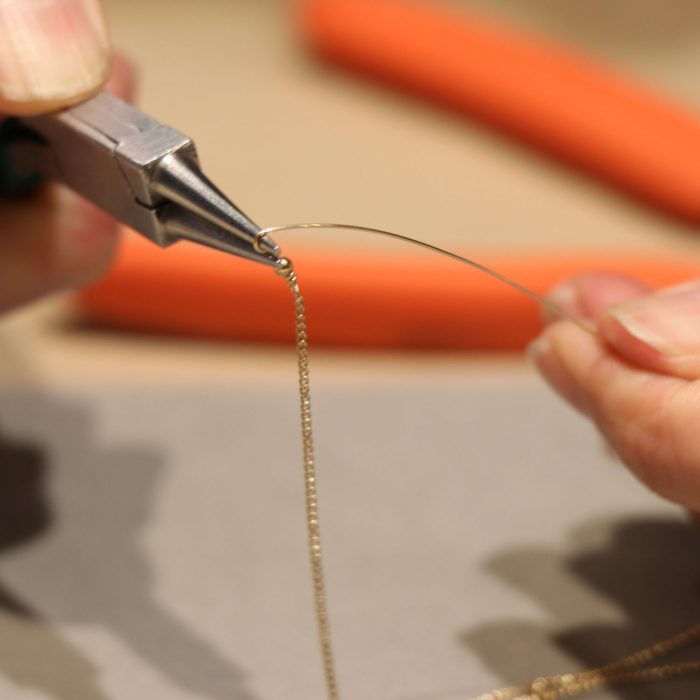
Step 3- Hold your wire with the tip of your pliers at the fold of the 90 degree angle
Step 4- Holding the short end of wire, wrap wire back towards you against the pliers to create a smooth loop, leaving the loop open.
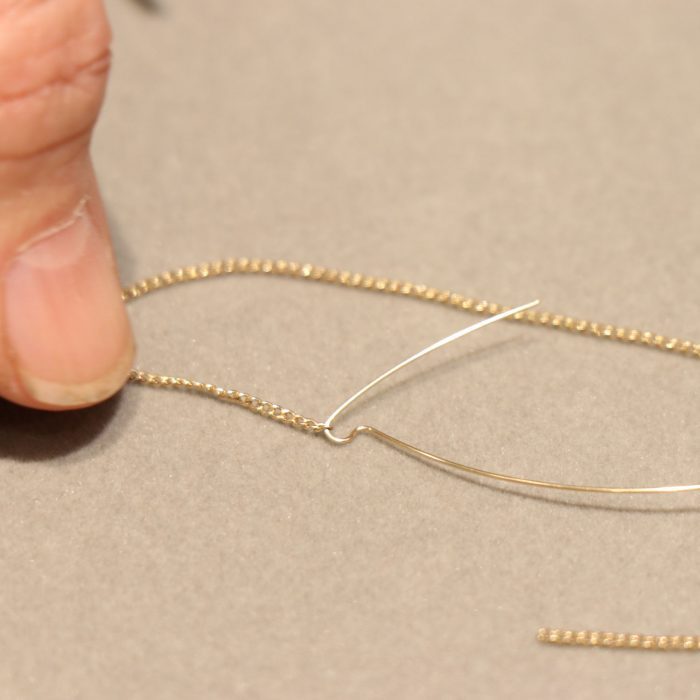
Step 5- Slide chain into unclosed loop
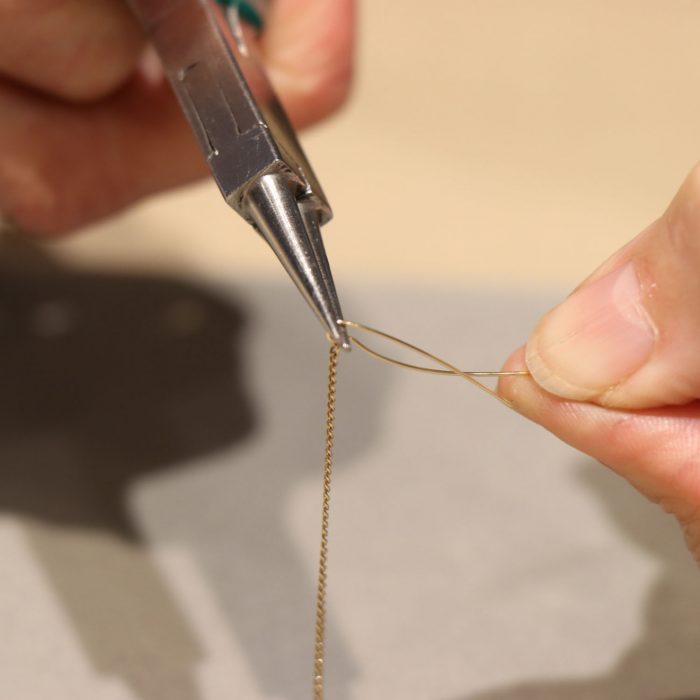
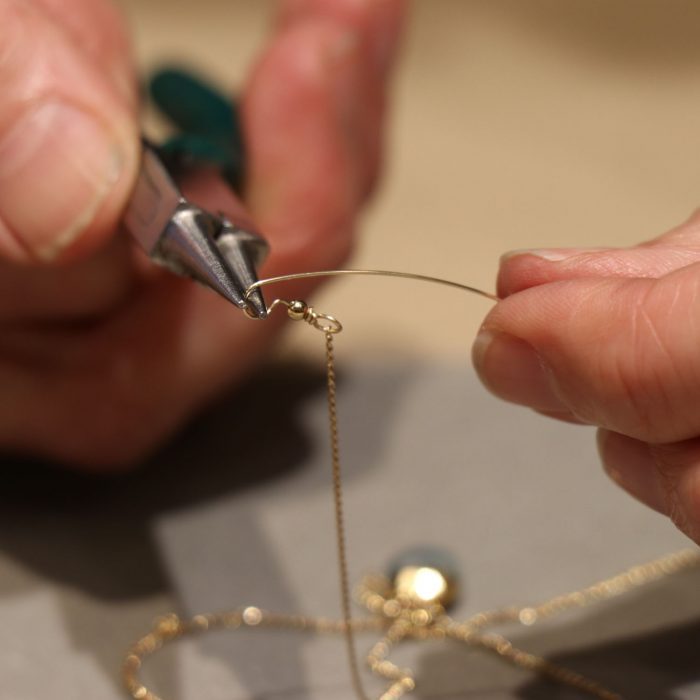
Step 6- Put pliers back inside the loop and hold the short end of the wire.
Holding the short end of the wire, finish closing the loop and wrap around the longer piece.
Step 7 – Wrap wire at least 2 times around to be secure.
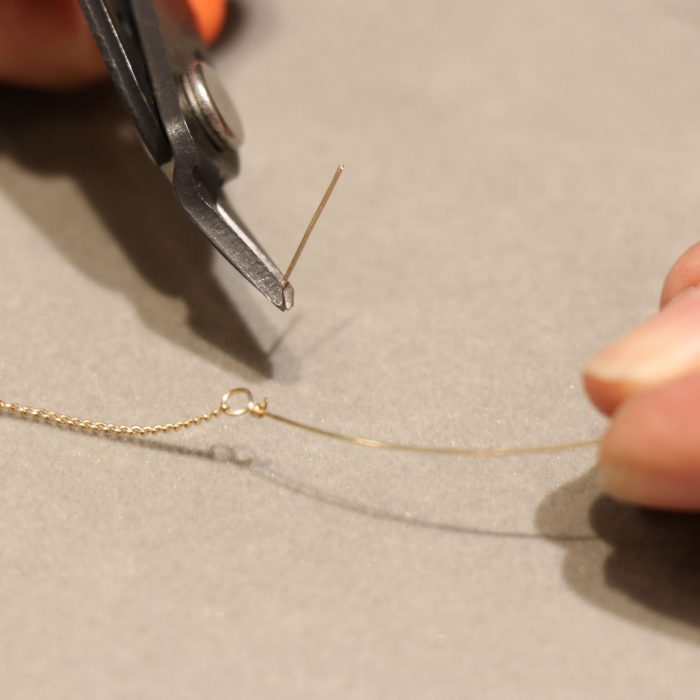
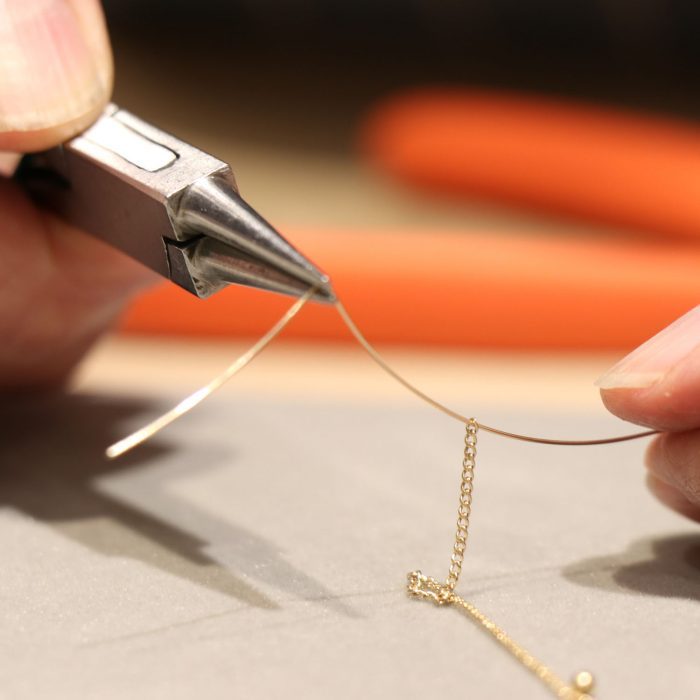
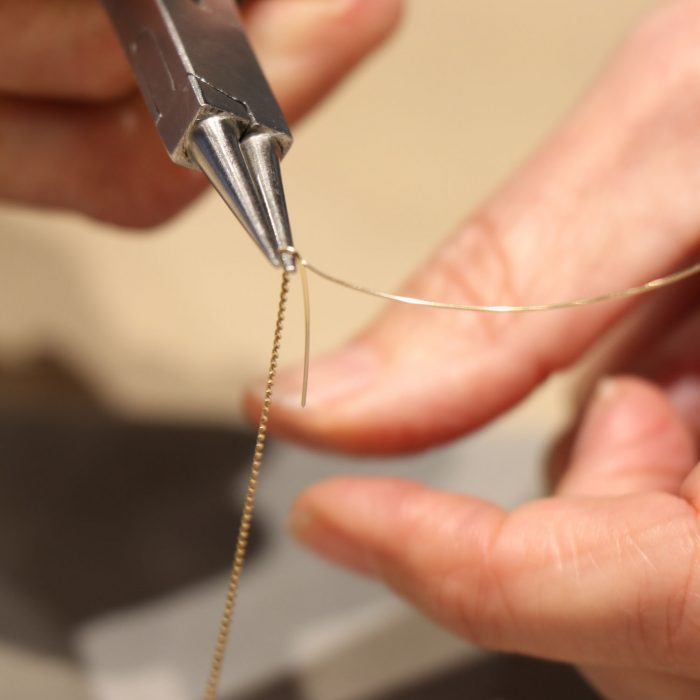
Step 8 – Cut short end wire off, as close to wrap as possible.
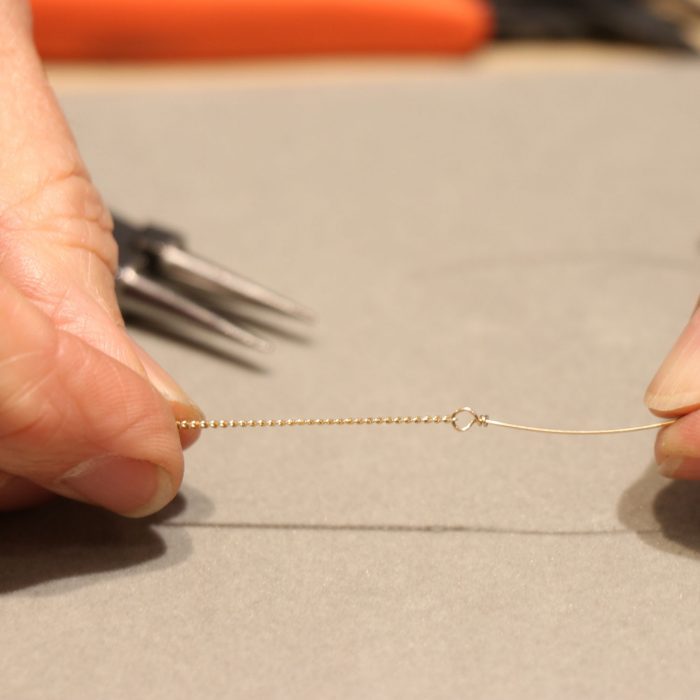
Yea!!!! Half way there!
Step 9- Using flat nose pliers, flatten rough tip of wire if needed.
Step 10- If you choose you can add a small bead.
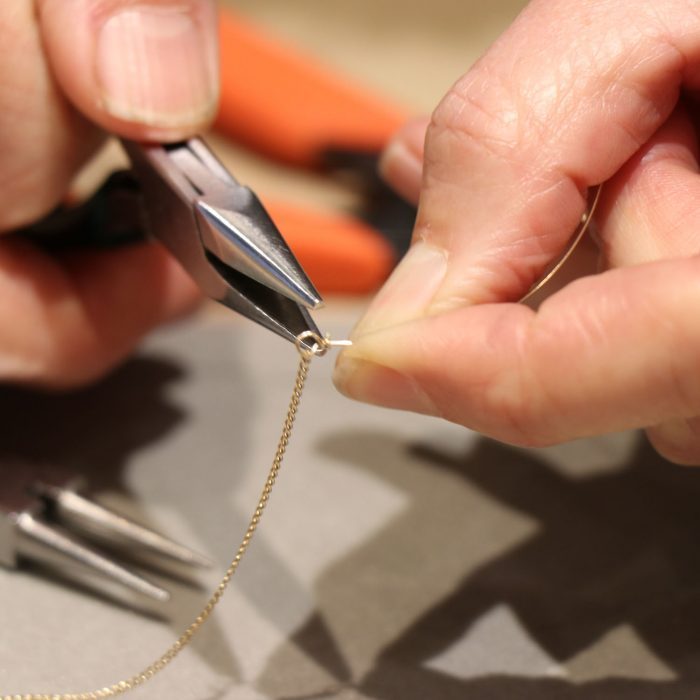
Step 11- Bring wire back towards you creating an unclosed loop, as in step 4.
Step 12- Add clasp into unclosed loop.
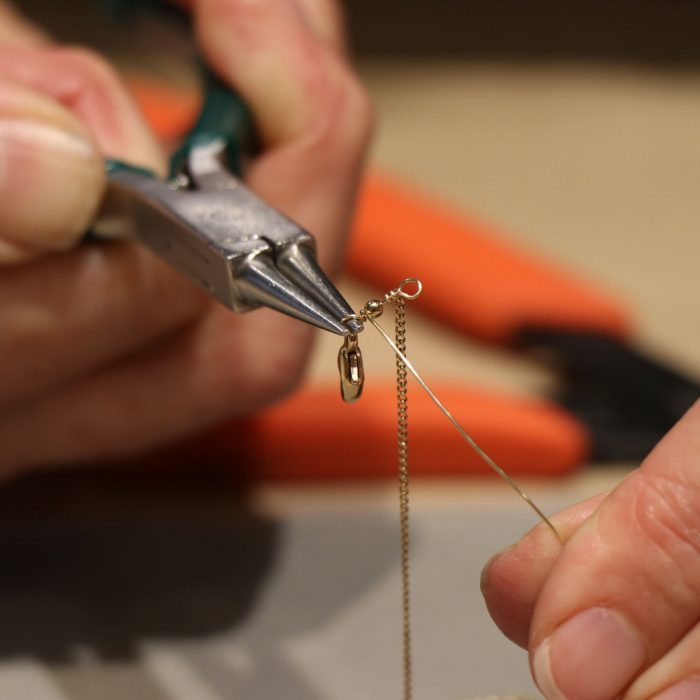
Step 13- Put pliers inside loop and wrap to close.

Step 15- Add pendant to chain before beginning the second side of your chain closure.
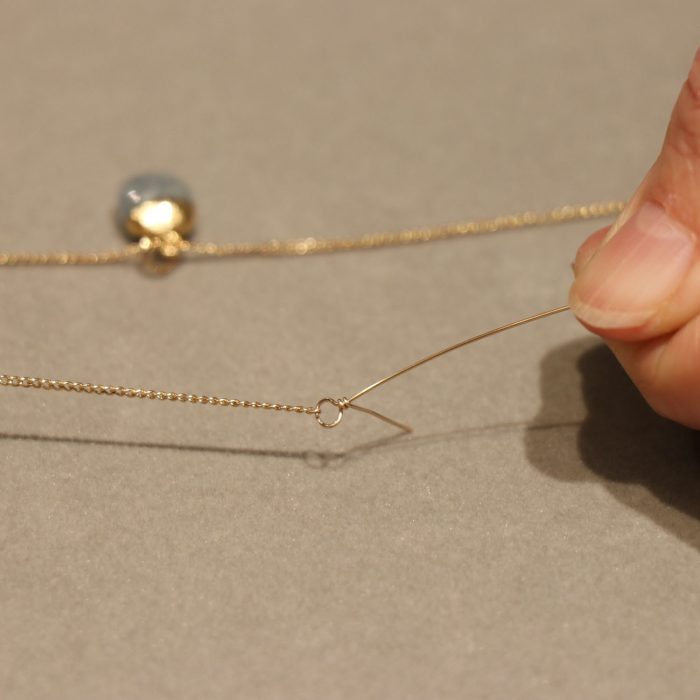
Step 16- Wrap wire as done previously.
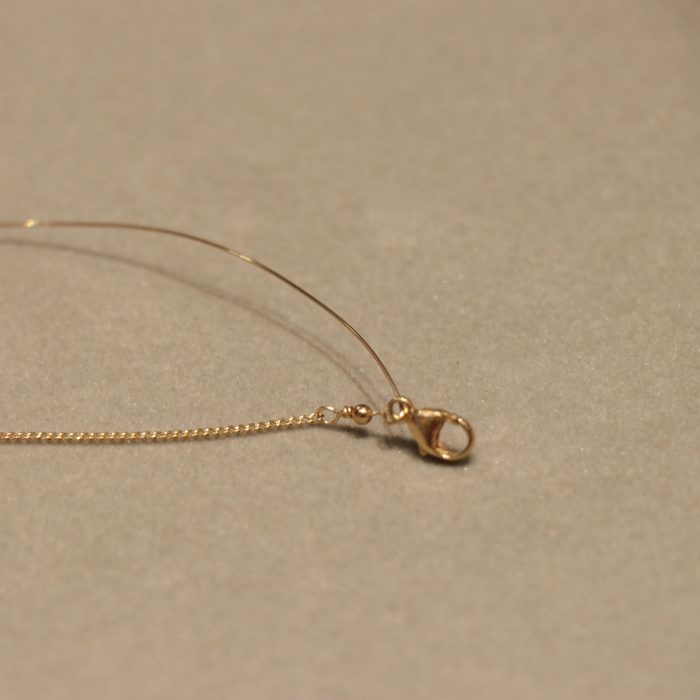
Step 17- Add your bead and create the final loop. Note: This loop should be a little larger for the clasp to hook into.
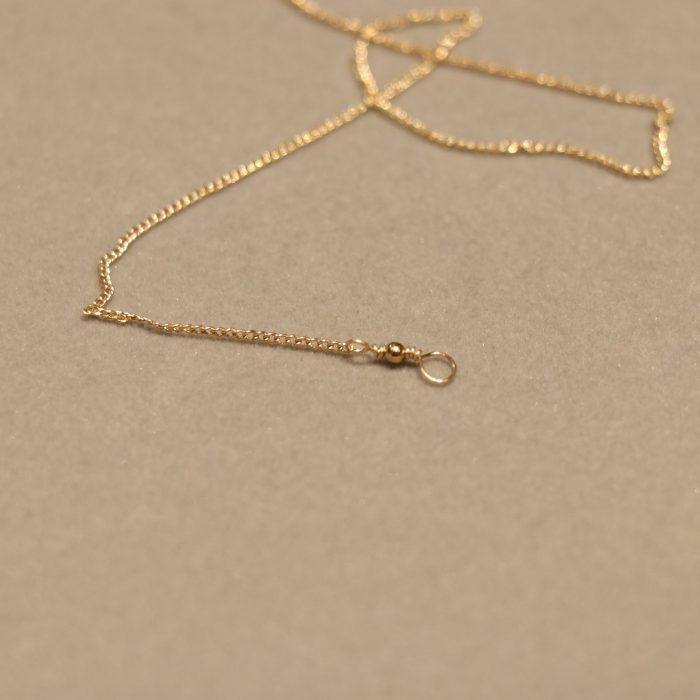
Final image with larger looped end.
Finish a project using calottes:
Watch this video to learn how to use calottes : a tidy way to finish your pieces made with nylon, cotton and much more…
Knotting elastic cord:
Elastic bracelets are fun to make, easy to put on and easy to tie up! Depends on the elastic cord that is used, the type of knot to tie it. We will demonstrate two different types of knots that are very useful with elastic cord, you can play around with different textures and materials as long as your string fits through the beads.
There are 3 types of elastic: Stretch Magic, Opelon & Fabric elastic.
More information of the elastic cord types here:

Tip: You can hide the knot with a crimp cover or a large holed bead that allows the knot to be inside.
Make a classic pair of pearl earrings:
These beautiful pair of earrings were made with headpins only! We used a fresh water pearl but keep in mind you can use any beads of your choice as long as they are center drilled beads. Experiment by adding your personal touch mix & matching materials!.
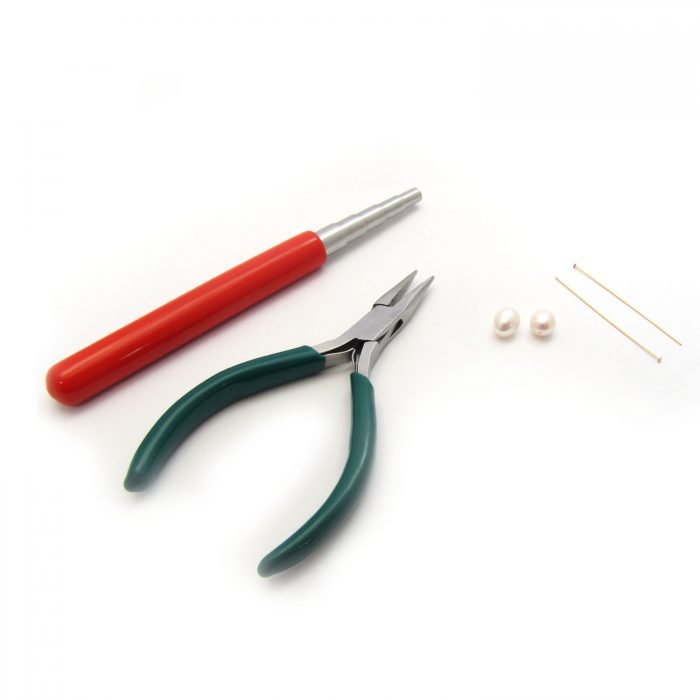
These are the materials & tools needed:
- 2 center drilled beads (2 potato pearls)
- Two gold fill 2″Headpins (24 gauge)
- A mandrel
- Flat nose pliers
Tip: You can use any type of headpin, they may vary upon the length and gauge size.

A classic Pearl earring
All the materials you need. Let’s begin!

2) Place your flat nose pliers on top of the bead.
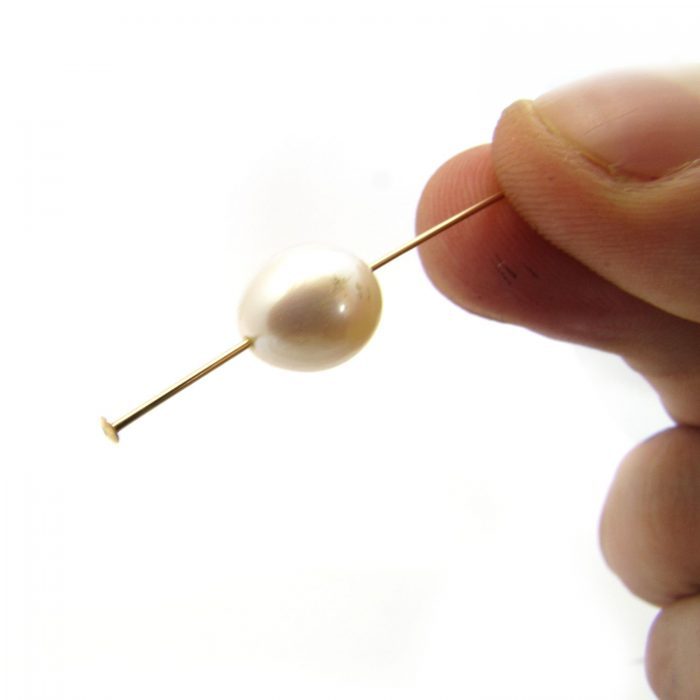
1). Take your bead and slide it onto your headpin.
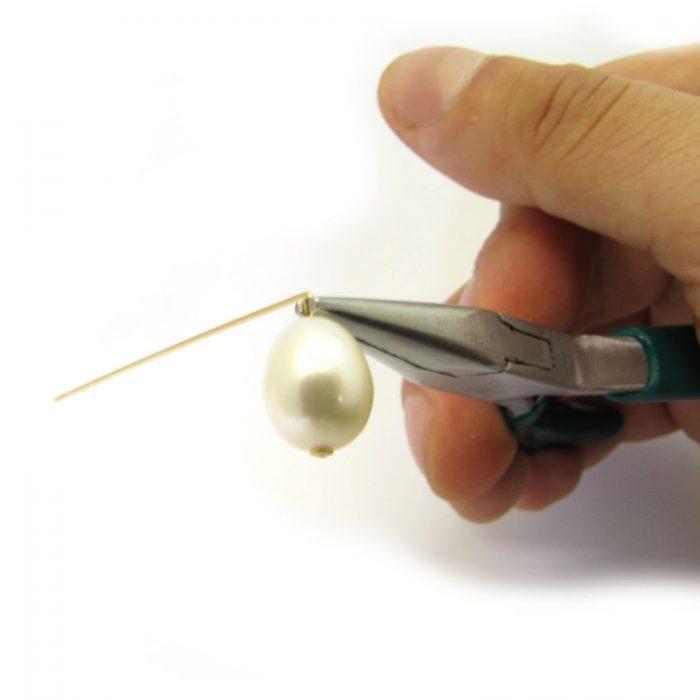
3) Bend the wire in a 90 degree’s angle.
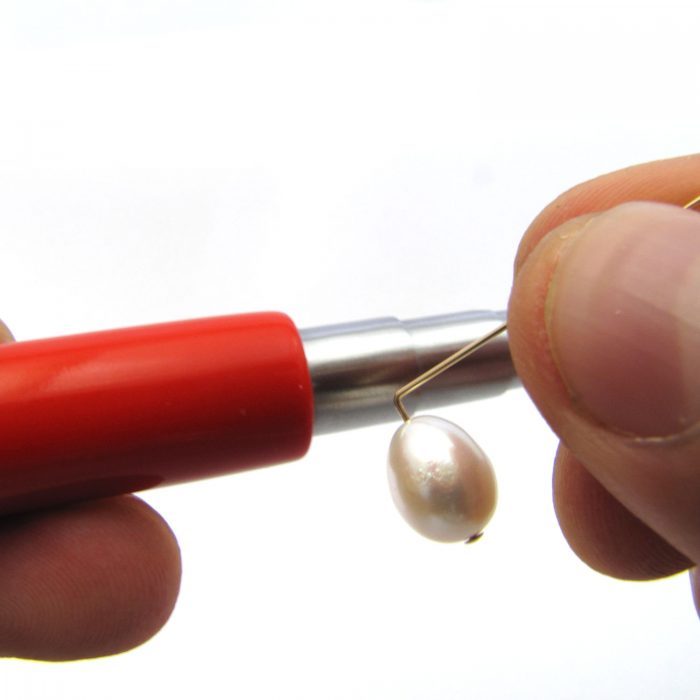
5) This is how it should look, don’t bent too far or you might get a complete loop.
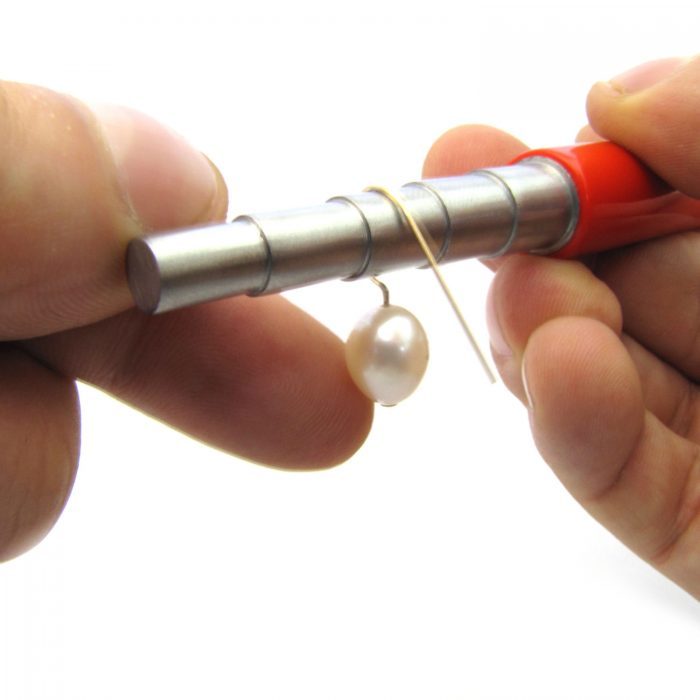
4) Place the headpin onto the mandrel to shape a half circle, which creates the earring hook.
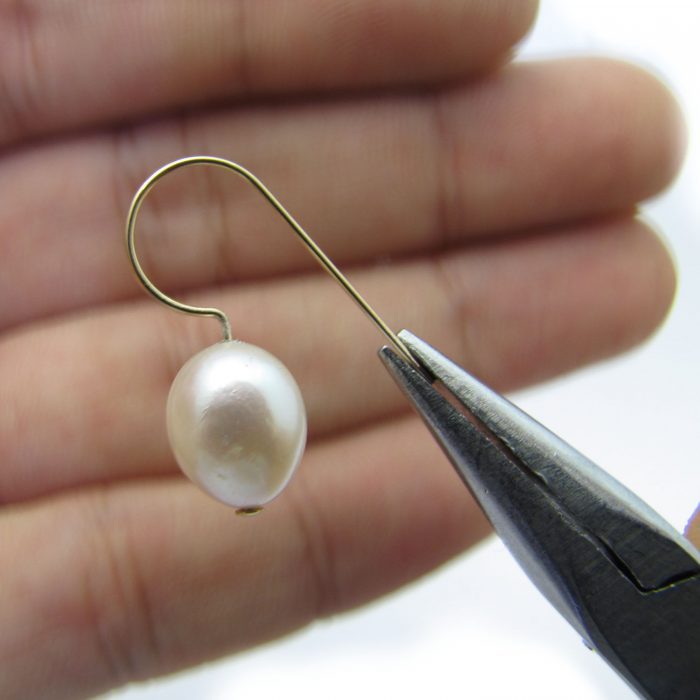
6) Take your Flat nose pliers again and bend the tip of the headpin slightly.
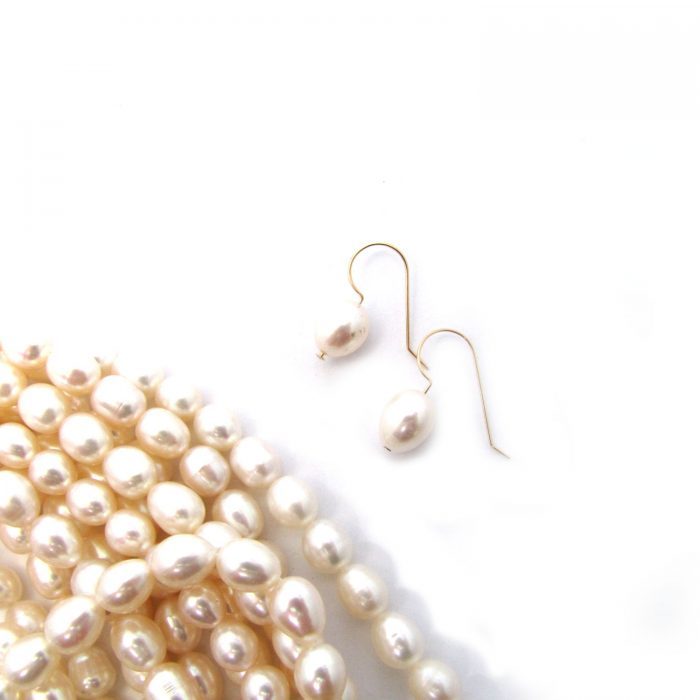
Beautiful earrings made in no time!
Make a new tassel to replace an old raggedy one!
What to do when your beautiful necklace has an old, worn-out tassel? Replace it, of course!
Here’s a quick, easy way to make a full, luscious cotton tassel with only some embroidery thread. Follow this simple how-to and bring your necklace back to life!
Thanks to our friend, present customer and past employee, Laurie @beadist1 , who shared the idea with us.
Materials needed – really….that’s all.
- Embroidery cord – 1 skein/bundle
- A large eye needle
- Scissors
Tip: If you have a loop at the bottom of your piece add the tassel directly on.

A great tassel using a bead cap, some wire & the cord of your choice!
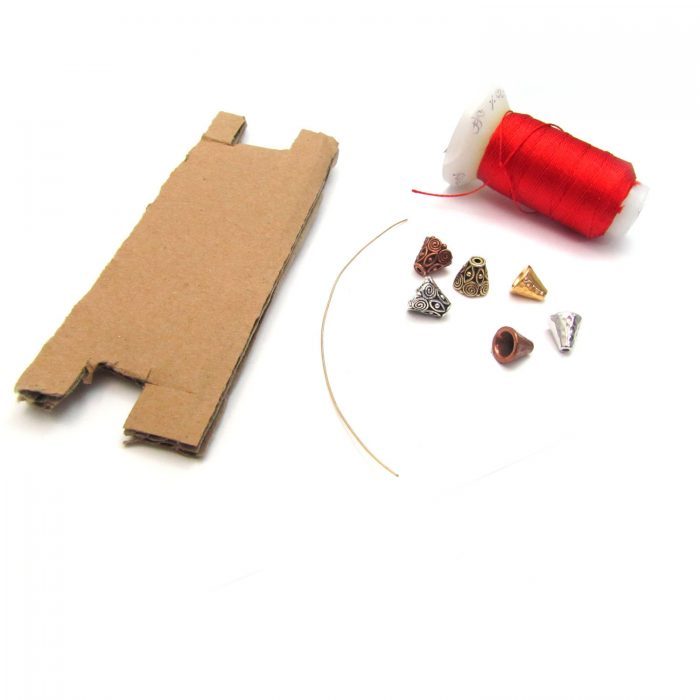
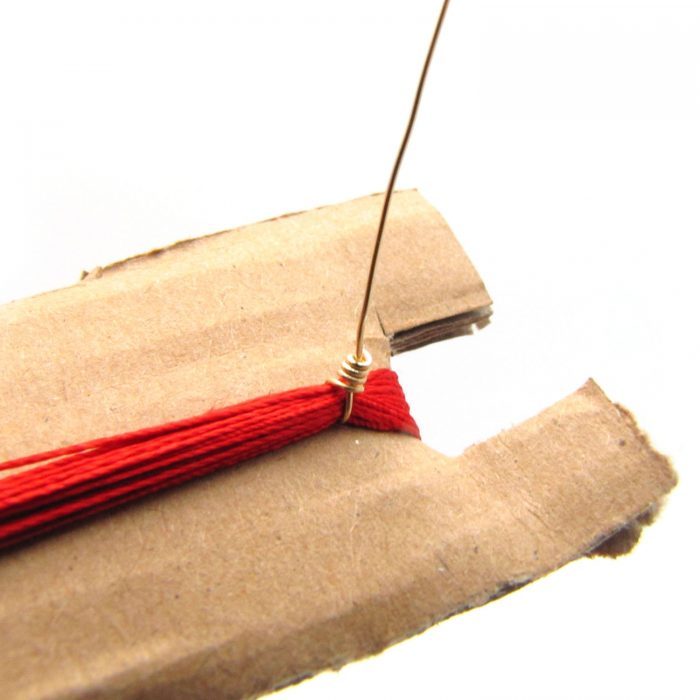
Materials needed for your tassel project. As shown any piece of cardboard or stiff paper can be used.

Step 1. Cut the cardboard to desired size. Wrap your cord around it until all cord is used. Tie cord ends together at the bottom of the cardboard.
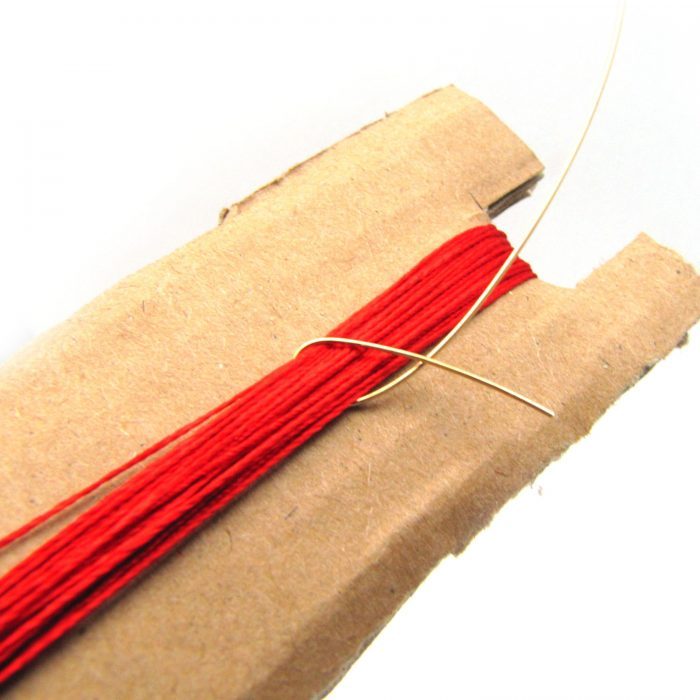
Step 3. Take your piece of wire and wrap it around the cord at the top of the cardboard.
Step 4. Coil one end tightly around cord and cut off the excess wire leaving only one end of wire. Try to make it as small as possible (yet still secure) so it will sit inside the bead cone.
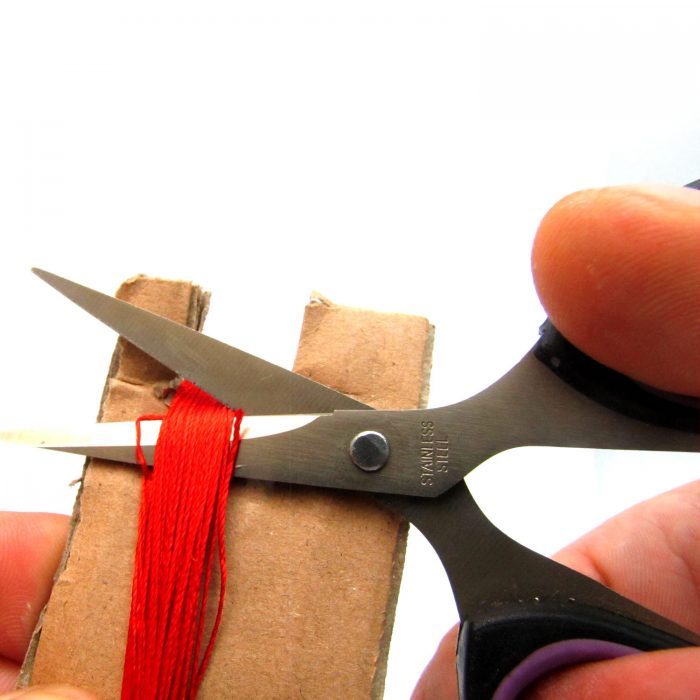
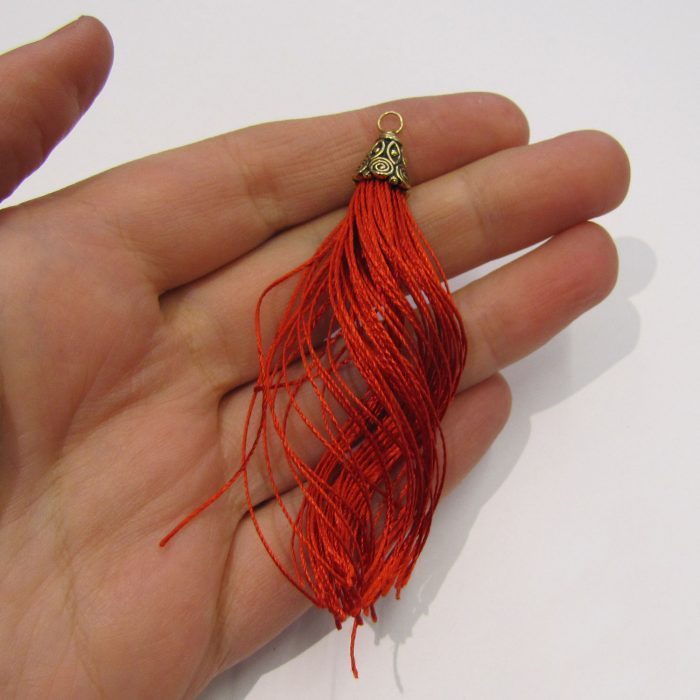
Step 5. Cut the silk cord with sharp scissors at the bottom of the cardboard, farthest away from the wire to give the tassel maximum length.
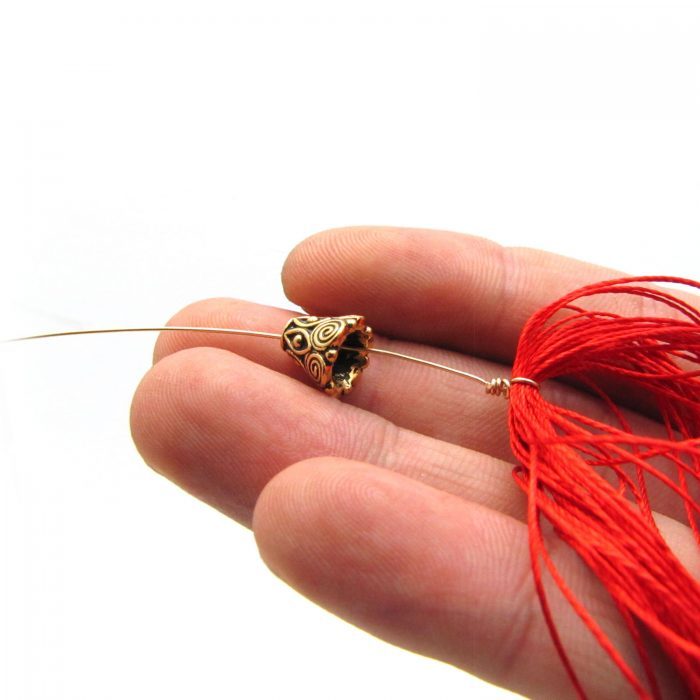
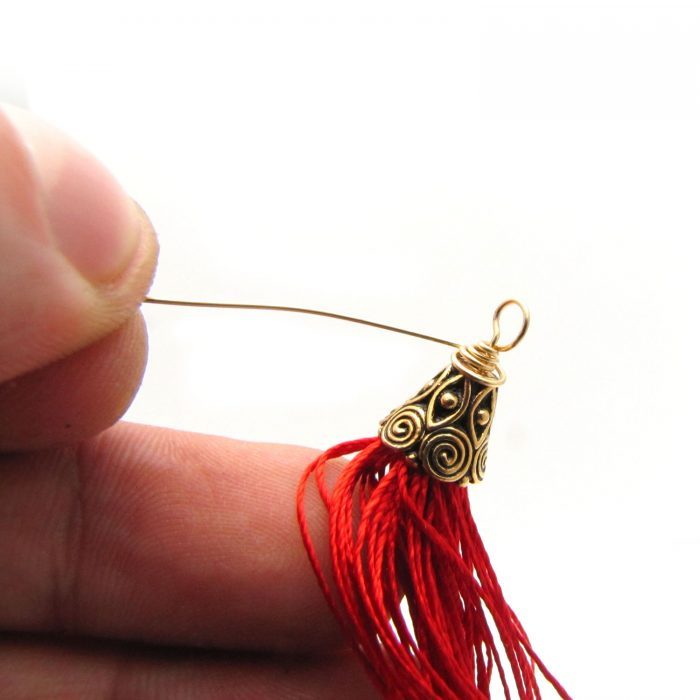
Step 6. Slide the wire through largest end of your chosen bead cone so the wire “knot” is hidden inside.
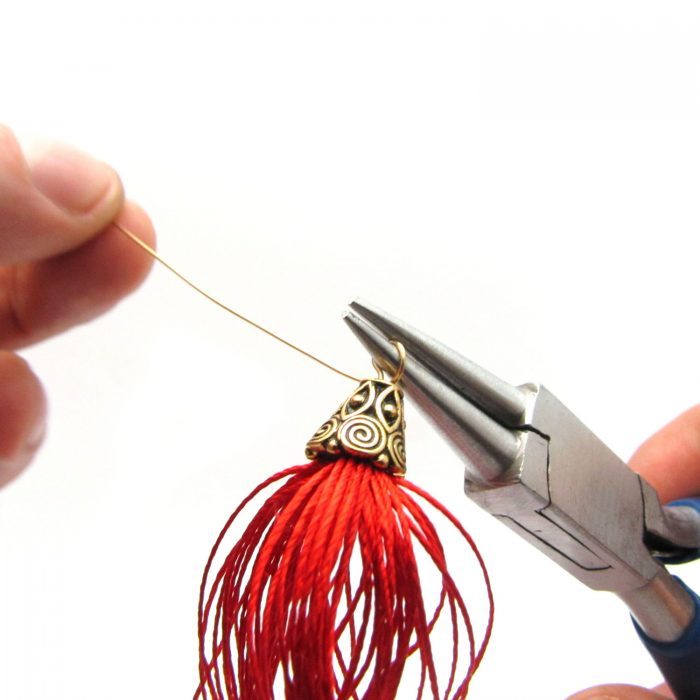
Step 7. Take your round nose pliers and make a loop.
Step 8. Wrap the extra tail of wire around the base of the loop making it more secure.
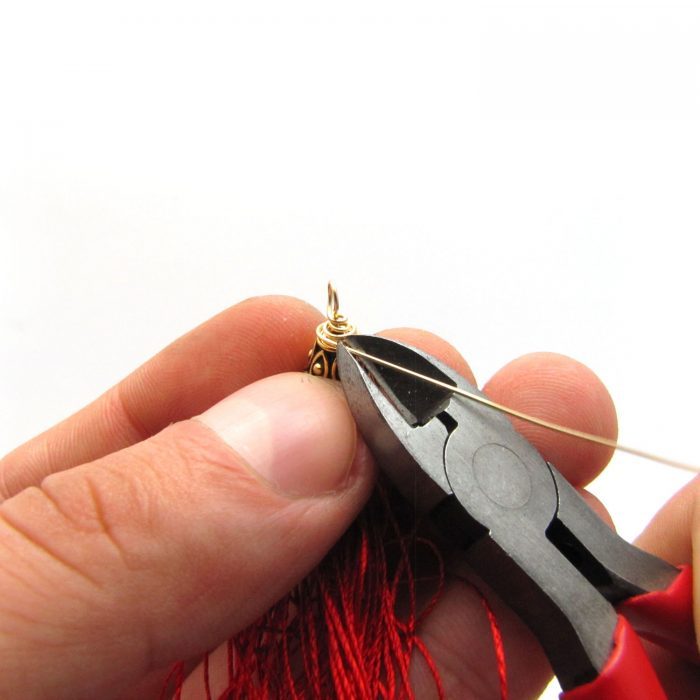
Step 9. Cut off excess wire with your wire cutters. With flat-nose pliers, press in the end of wire so it’s not sticking out.
Step 10. Completed tassel- ready to be added to your jewellery piece! Experiment with the length of the tassel, quantity of cord, mixing colours or materials to change up the style of your tassel.
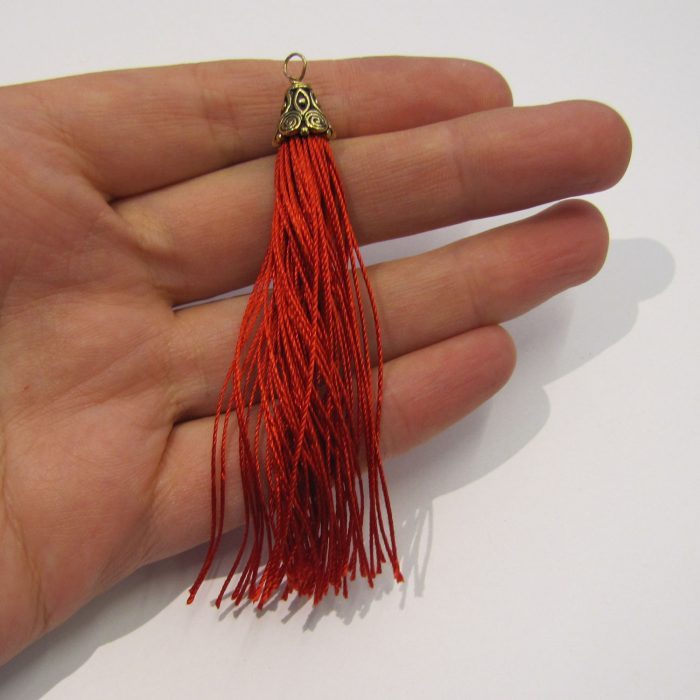
Step 11. Tip – Cord (especially silk) can hold it’s shape when coming off of a spool. Hang it over a steaming kettle to soften out the kinks and curls. Watch your fingers and use an awl to hold it!
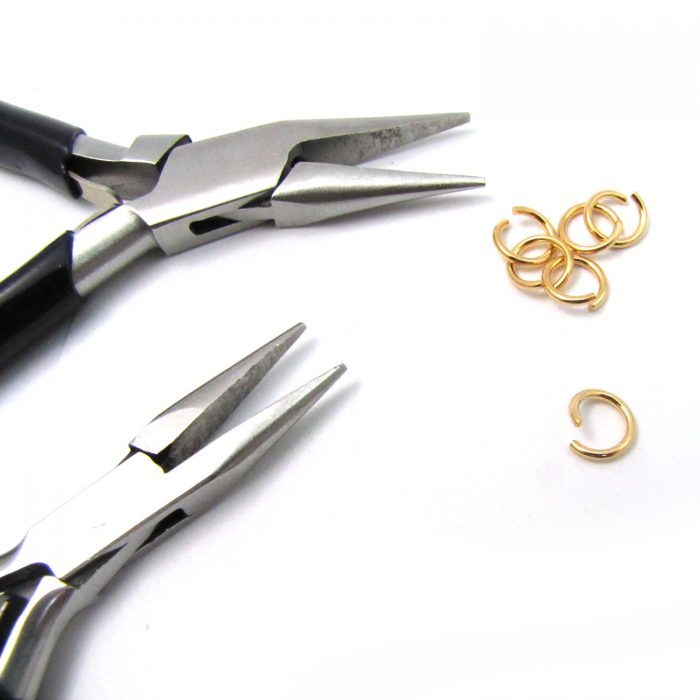
Follow these steps to open and close a jump ring!
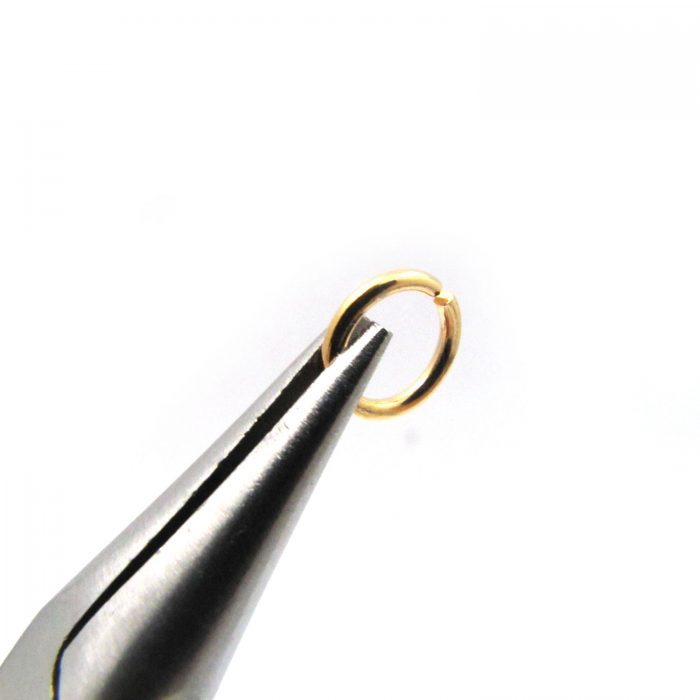
Step 1: With one pair of Flat nose pliers hold the jump ring halfway, right were the opening is located.
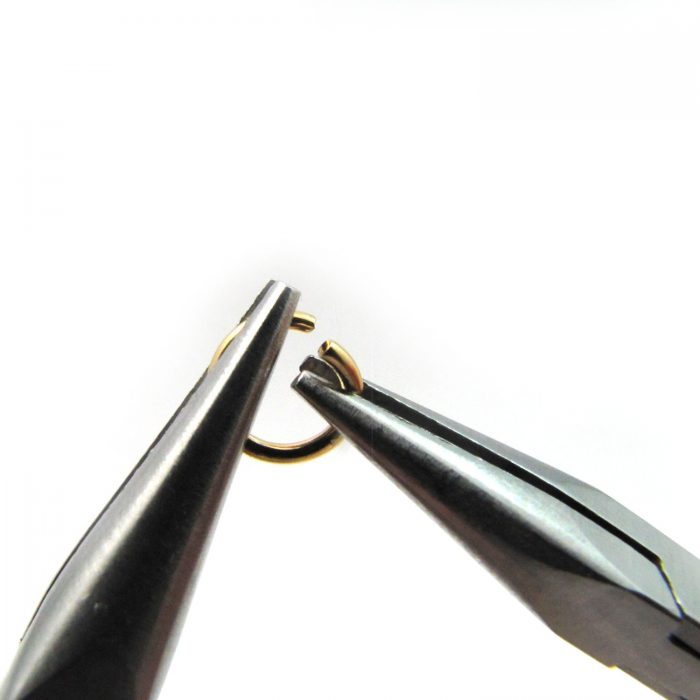
Step 2: Take the second pair of flat nose pliers and hold the other half of the jump ring.
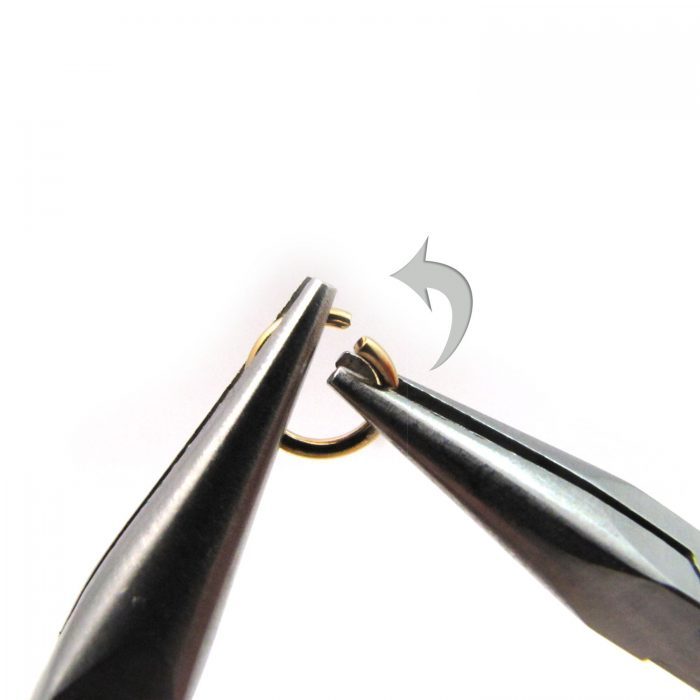
Step 3: To Open/Close a jump ring, bring either one of the flat nose pliers towards yourself, and the other pair should do the opposite.
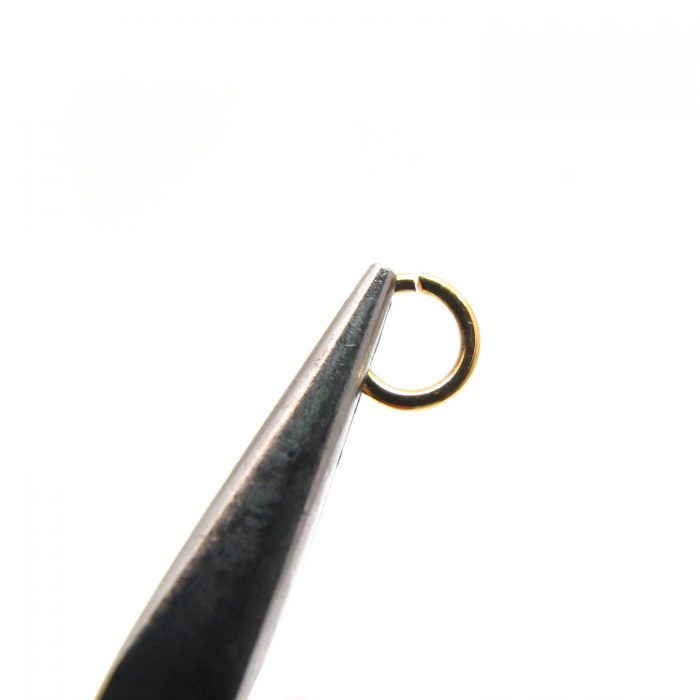
Step 4: The jump ring must be securely closed, perfect for adding a tassel or charm to any piece of jewelry!
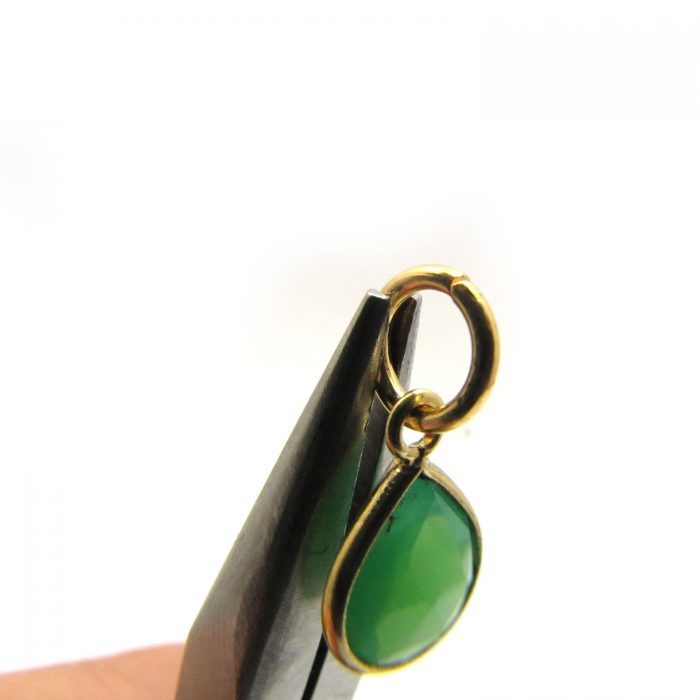
Here’s an example with a Chrysoprase drop.

Right-Click , Save Image As
Use the arrows at the sides of the image or the dots below to move through the steps of this project.
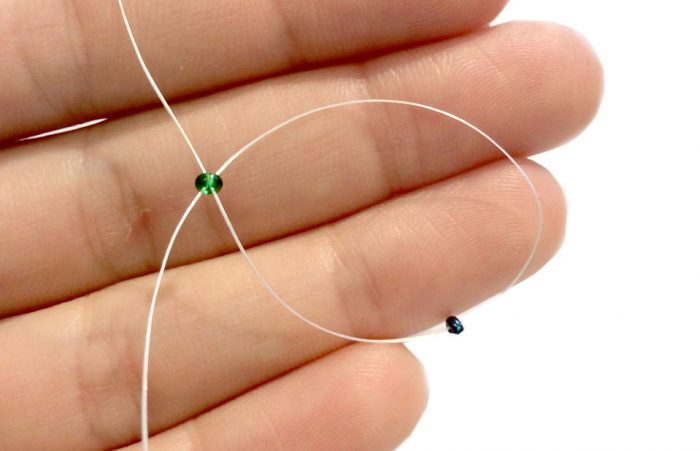
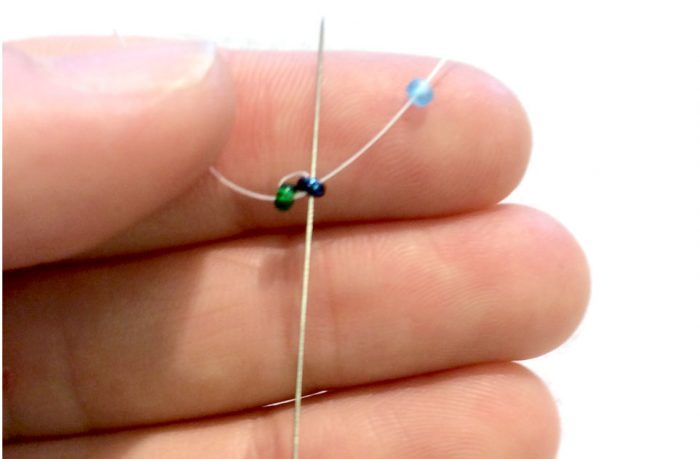
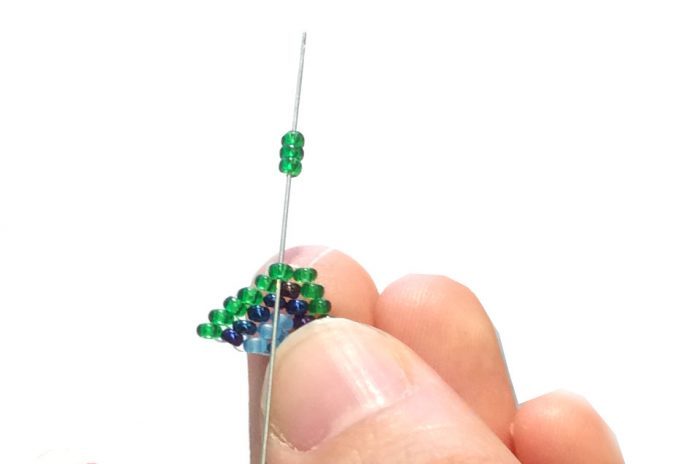
Start with an arm span of your beading thread and add the needle. Then you’ll string your first two beads. Put your needle back up through the bottom of the first bead (where your tail is coming out) and down through the top of your second bead.
Now you add your third bead, and put the needle up through the bottom of your second bead…
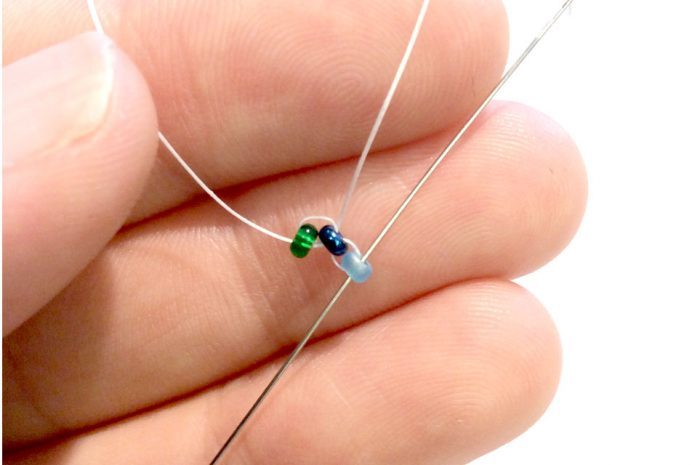
Then back down through the top of your third bead.

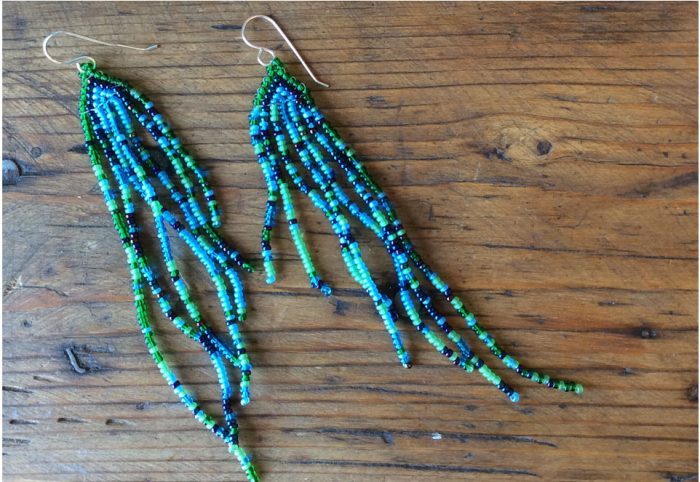
Continue until you’ve finished the first row. I’m using four colours in my design so my row has seven beads.
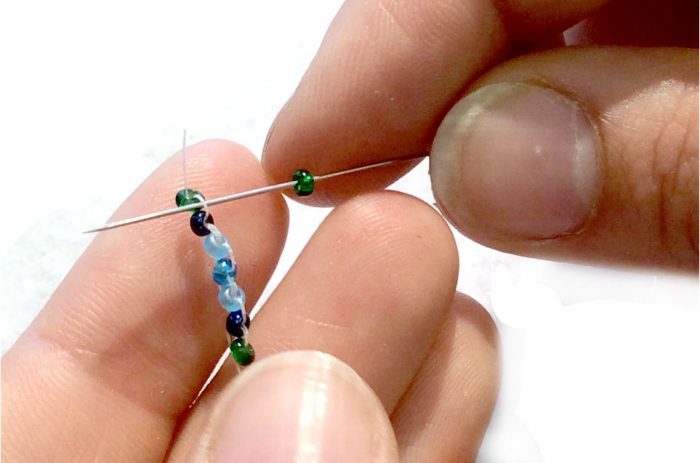
Now to start the second row. String your bead on the needle, and put it underneath the thread that’s holding beads 1 and 2 together from the first row. Pull the string all the way through.
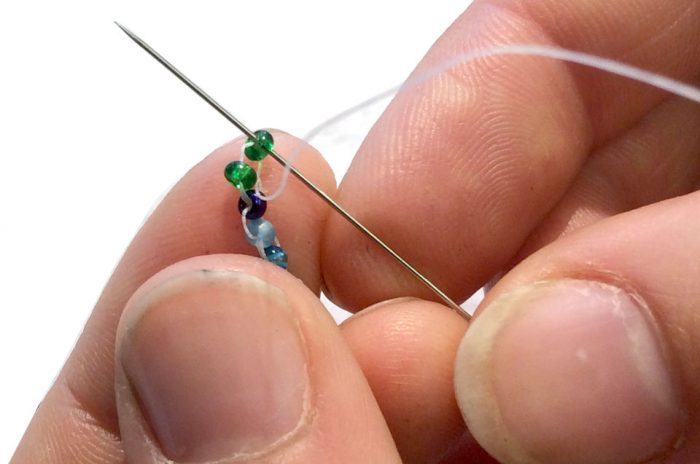
Next put the needle back up through the ‘top’ of the bead (the same side the thread is coming out of)
Continue this process until you’ve got a row with only two beads in it. Then you’ll string on three beads – this will be where you add your earwires at the end.

She’s a beauty! Now you need to thread the needle down through each bead along the edge (all the green beads) so the thread is coming out from the very edge of the longest row on the bottom.
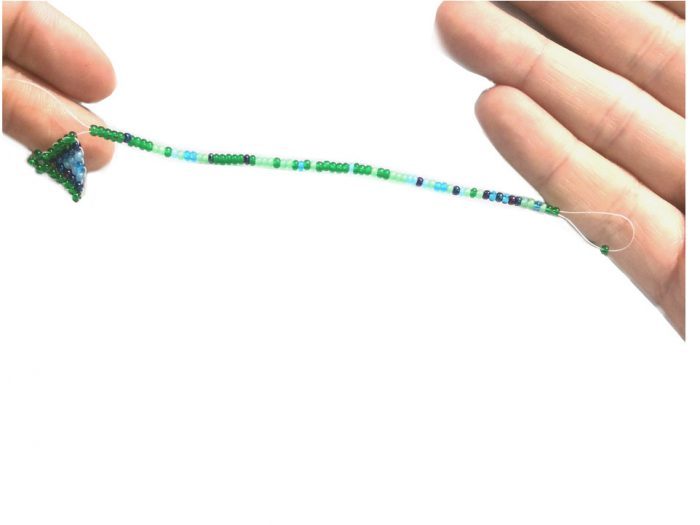
Now we’re making the fringe part! Add as many beads as you need to make as long or short a fringe as you like. Then, excluding the very last bead you strung on, run the needle back up through all the other beads you’ve just added. Holding onto the one bead on the end can help you get all the beads in tight together.
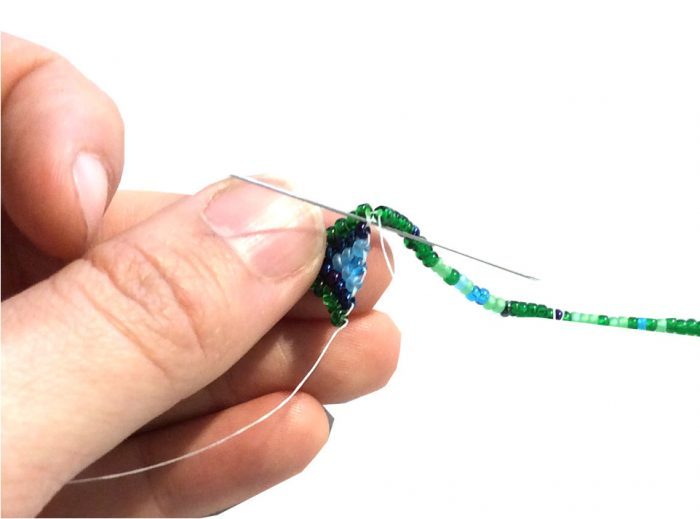
Put the needle through the thread connecting beads 1 and 2 on the brick stitch half. Make sure your thread is nice and tight! Now continue this pattern to complete your fringe. On this pair I made each row 4 beads shorter than the one before it.

Once you’ve finished your fringe to close it off and make sure your beads stay in place you need to weave the thread through your beads two or three times. I do this by weaving the thread through four beads over two rows. Once you feel your thread is secure enough you may cut it off. Add an earwire and you’re halfway done! One more to go!
Use the arrows at the sides of the image or the dots below to navigate through this tutorial.
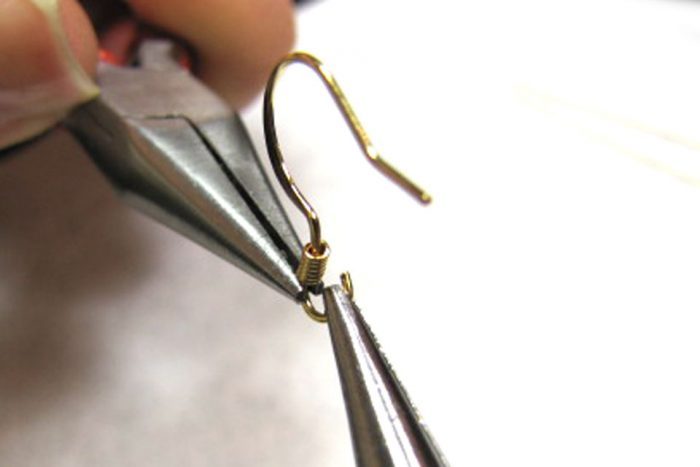
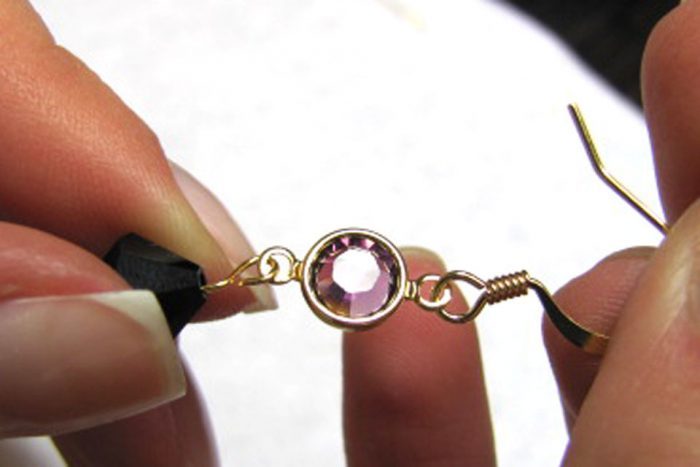
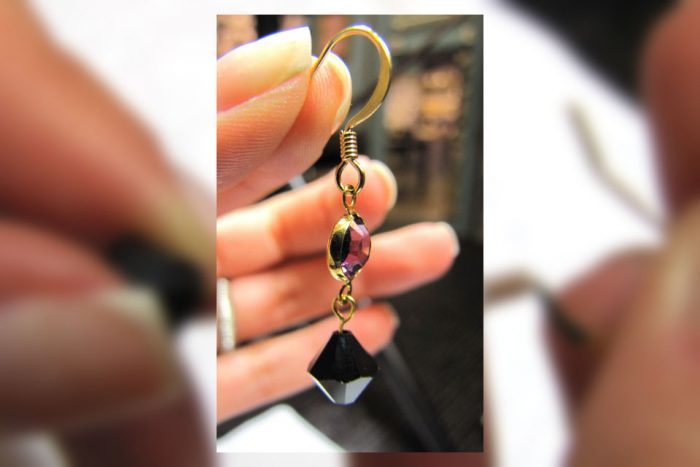
1. Open loop at bottom of the earring hook. Using two pairs of flat nose pliers, use one to hold the earring in place, and the other to pivot the loop open.
2. Slip the loop of the crystal onto the open loop of the earring hook.

3. With flat nose pliers, close the earring loop again by pivoting it back into place.

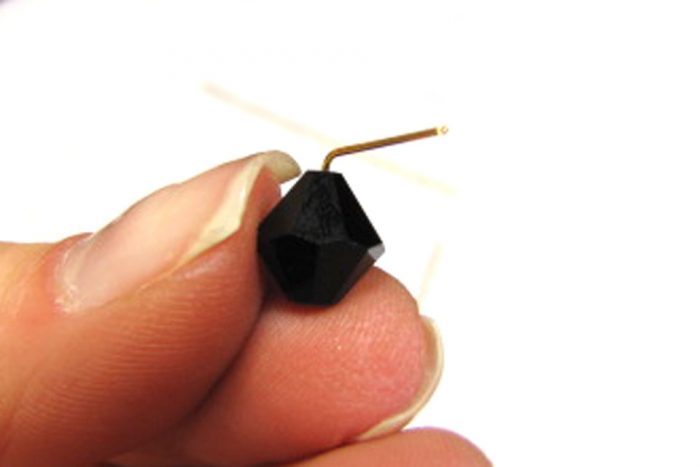
4. Place a bi-cone crystal onto the headpin.
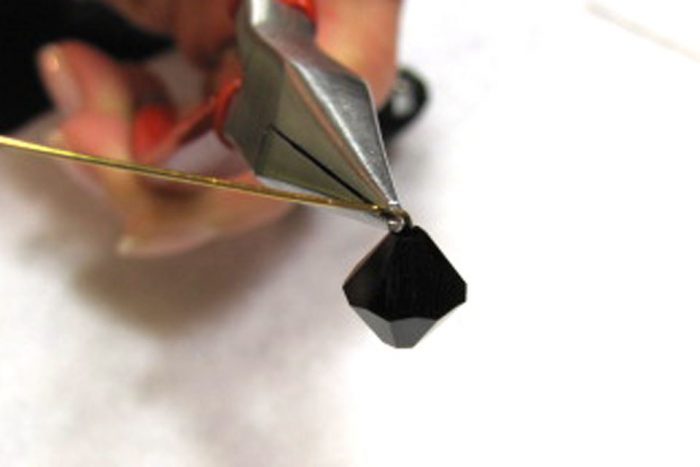
5. Using flat nose pliers, bend the wire at a right angle right above the top of the crystal.
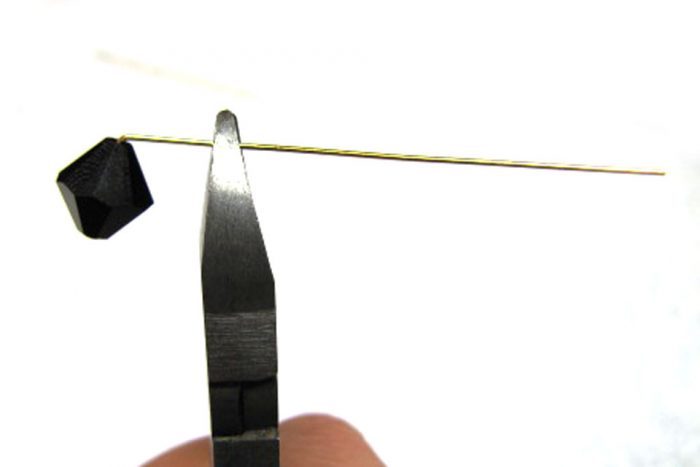
6. Cut off the excess wire of the headpin, leaving at least a quarter of an inch of wire after the bend.
You will use this excess wire to make your loop.
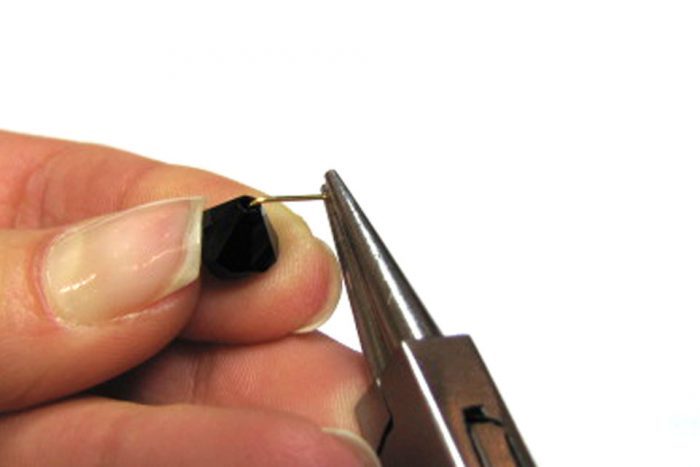
7. With round nose pliers, hold end of the wire and roll the wire by rotating the pliers toward the bead to form a loop.
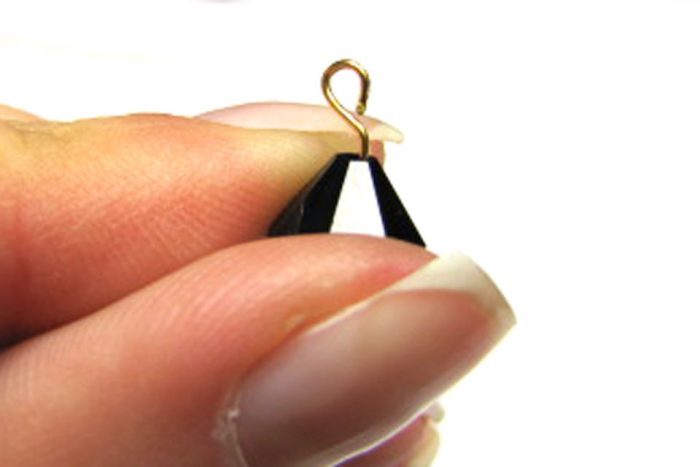
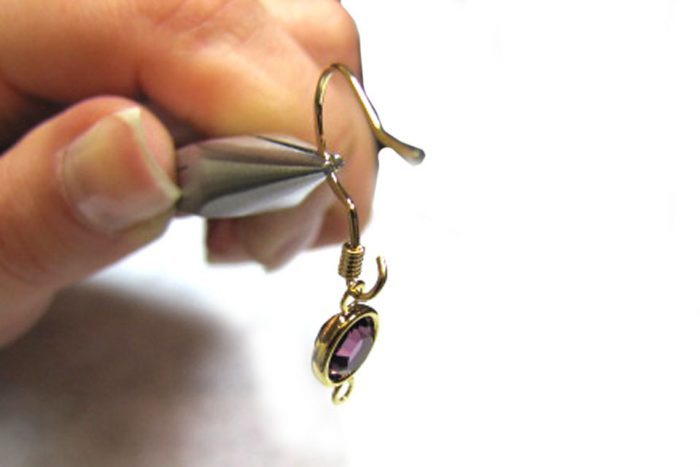
Finished Loop